Weather-resilient plants are those that can withstand extremes in weather and thrive long-term under these conditions. Whether you are planning a new garden or want to fortify an existing garden that is suffering from drought, flooding, unpredictable frosts, heat waves, or storm damage, the following guidelines should help improve the survival rate of your plants.
STEP ONE
Identify microclimates in your garden. Microclimates are localized areas that have their own temperature range, moisture level, and air circulation. They are created by southern (warmer) versus northern (colder) exposure, location in full sun or shade, water drainage and soil type, terrain and slopes, and proximity to water bodies, trees, and man-made structures such as buildings. There can be a wide range of different microclimates within your backyard. For example, you may notice that certain plants growing next to a fence or at the bottom of a slope often get damaged by late spring frosts or an early fall frost. This is called a frost pocket and is caused by cold air sinking downward and being trapped by the fence, creating a natural bowl effect. You might also notice that next to your house, which absorbs heat during the day and radiates heat at night, you can grow more tender plants. Urban areas with clustered buildings and dark pavement can act as heat islands.

STEP TWO
Keep a garden journal. Record your observations about the microclimates in your backyard and which areas seem most vulnerable to extreme weather conditions. At the same time, do a site assessment in which you determine how much sun the garden beds receive, what type of soil you have (sandy, loam, or clay) and its drainage, and the physical terrain. A sunny site will be warmer and dry out more quickly than a shaded one. Clay soil holds more moisture than sandy but has poorer drainage. Low-lying areas are usually wetter and have less air circulation than the top of a hill. Look for other factors, such as runoff of storm water from gutters and paved or hardscaped surfaces than can cause periodic flooding. Coastal areas may be more prone to damage caused by salt water and high winds.
For an existing garden, be sure to also record which plants have performed the best over several years and which ones have not done well or have died. What are potential threats and current problems? Are the right plants in the right sites? Is a soil test needed?
STEP THREE
Make a plan. For a new garden, it’s a good idea to draw a sketch of the overall design with approximate dimensions and notations of any issues you’ve discovered during your site assessment. Do contact utility companies before you dig to avoid hitting underground lines. Plant selections should be appropriate not only for your USDA climate zone, but also for the microclimate and conditions of the site. To further ensure durability, plants should be low maintenance, reliable, and disease resistant. Many native plants possess these qualities and attract native species of pollinators and other beneficials. Biodiversity of plants, which means a wide variety of plant species, will increase the chance of success of the garden because of reduced risk of disease and pests and less competition for the same nutrients. Locally grown plants are generally best suited to your USDA climate zone and their transportation uses less fossil fuel. Before you buy a plant, find out if it’s aggressive and might take over the garden and examine it to make sure it’s healthy.
To make improvements in an existing garden, decide what issues need to be addressed. If intermittent flooding is a problem, a simple fix might be to redirect downspouts. On steep slopes, a swale or ditch could be dug to channel water away. Chronically wet sites might benefit from the installation of French drains or conversion into rain gardens. Dry sites, whether sunny or heavily canopied by trees, require drought-tolerant plant selection and good mulching. Windy sites may need a windbreak and plants that are flexible and resist storm damage. Frost pockets often have temperatures lower than the regional USDA climate zone and should have cold-hardy plantings. Beds suffering from excessive summer heat can be partially shaded by plantings of trees and shrubs nearby.
STEP FOUR
Prepare the site. For a new garden, the least labor-intensive method of dealing with turf is not to remove it, but to incorporate it into a soil building process. In the no-till or “lasagna” method, sheets of newspaper or cardboard are laid down over the lawn with successive layers of compost and biodegradable, undyed mulch. This method is most economical in not requiring the purchase of soil amendments because the topsoil is preserved and the grass gets converted into nutrients. Although sustainable, this method will take several months to fully break down the turf. Meanwhile, holes can be punched through the sheet layer and plants dug into place. For details, see the Oregon State University Extension Service website on sheet mulching.
In amending the conditions of an existing garden, regardless of the problems or soil type, compost is always a good solution. It improves soil structure and aeration, drainage of wet, clay soils, retention of moisture in dry, sandy soil, and moderation of soil temperature. In addition, compost enriches the soil with nutrients and microbes that produce a healthy growing medium for plants. When turning compost into the soil, minimize disturbance of soil layers and take care not to injure roots of established plants.
STEP FIVE
Planting and mulching. Do your homework on the plants you have selected as to their mature size and tendency to spread. Allow sufficient space between them for growth and proper air circulation. Be aware of the path of the sun and how taller plants might shade shorter plants and the soil throughout the day. Once plants are arranged and in the ground, water well and then spread mulch over the entire bed, keeping it a few inches from the stems and trunks. Mulching not only inhibits weeds, but also reduces moisture loss from the soil. Dry sites are best covered with undyed wood mulch (black mulch absorbs heat and can increase local temperature), chopped leaf mulch, or other natural, sustainable mulches. Extra mulch, such as seedless straw, applied before winter can insulate the ground and help prevent freeze-thaw cycles in the soil that cause upheaval of shallow-rooted plants. In spring, remember to thin out the mulch so emerging plants aren’t smothered, and the soil can warm up.
All of the above applies to an existing garden bed that is undergoing renovation or reorganization. When moving plants to a more suitable location, try to time this when they are near dormancy, in early spring or fall. This will lessen the stress, especially if they are already struggling.

STEP SIX
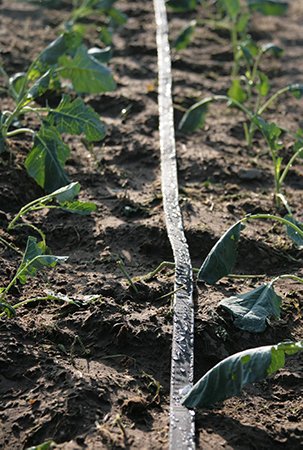
Maintenance and protection. Water management is essential, especially for new plants. To help them establish a robust root system, provide a minimum of one inch of water per week. Use a rain gauge, moisture sensor, or the “finger test” to determine when watering needs to be done. To decrease evaporation losses, water early in the morning and at ground level to thoroughly soak the soil surrounding the roots. This efficacious practice, as opposed to overhead sprinkling, conserves water and lowers your water bill. Rain barrels can collect excess rainwater runoff from gutters helping to prevent erosion and flooding in borders next to the house. On a dry day, this stored rain barrel water can be distributed via perforated soaker hoses laid around the garden.
To enhance the resilience of the garden to extreme weather, additional measures may be taken. Row cover, made of a lightweight white material, can protect plants from either frost or excessive heat. It also has the feature of shielding vegetables from pests, such as flea beetles. Other strategies to prevent frost damage include cold frames, newspaper cones (around roses), and overturned pots to cover individual plants that are removed the next morning once the air has warmed. Shrubs that are susceptible to cold winter wind damage can be protected with burlap wraps, piles of conifer boughs (recycle your Christmas tree), or temporary windbreak barriers. Trees that are at risk of storm damage and breakage, particularly if they are close to a residence, should be correctly pruned.

STEP SEVEN
Monitoring and evaluation. Throughout all four seasons of the year, continue to monitor the garden beds and make notes in your journal. Keep track of the conditions of the microclimates, as well as precipitation and extreme weather events, to see how the garden is holding up. Then make an evaluation. Are the plants vigorous and attractive in appearance? Is the garden flourishing and do some plants need to be divided? Were there any unexpected weather events and how did the plants fare? What other issues, such as weeds, pests, diseases, or poor soil, need to be attended in an ongoing manner? Have new problems arisen or does an old problem require a more proactive approach?

Gardening is always a work in progress and is further challenged by a changing climate. Keen observations of variable weather patterns and how they affect your garden microclimates will help you to modify your landscape or to adapt as necessary. Choosing sturdy, resilient plants over the finicky, short-lived exotics will save you money and frustration and is a key to success. By following these seven steps, you will be on your way to becoming a resilient gardener.
Judy Bigelow is a Master Gardener, CCE Monroe County.
Views: 7


