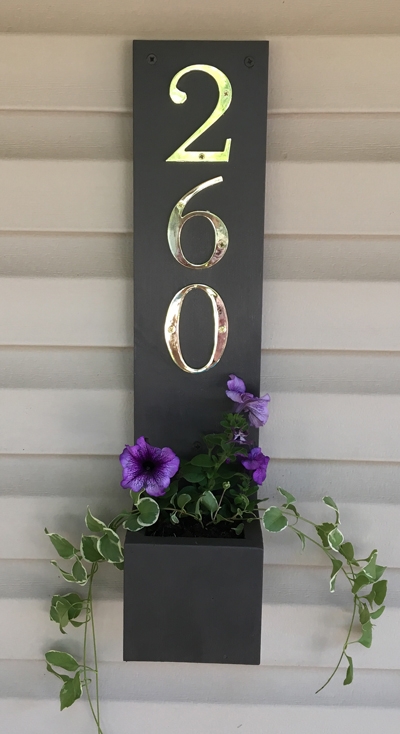
This house number planter will bump up the curb appeal of your homestead without breaking the bank, or taking too much time away from gardening. Some planning is required to customize it for your house number.

MATERIALS
1 x 6 Dimensional lumber, 4 or 6 feet long (see Step 1 to detemine length needed)
House numbers with hardware
Wood glue
1 inch nails, 18 gauge
4 Screws, 3 inches long
(for attaching planter to house)
Desired plants
TOOLS
Tape measure
Pencil
Circular or table saw
Sandpaper (optional)
Drill and various bits
Hammer
Paint or stain
Paint brush
Screwdriver
Fig. 1 Key
A. Start first number 1 inch from top
B. Center numbers on board
C. Space numbers equally as desired
D. Add 11 inches from bottom of last number
E. Each top corner hole is 3/4 inch from top and outer sides
F. Each bottom corner hole is 3/4 inch from outer side and 6 inches from bottom
Prepare: Plan, Cut and Drill
1. Place house numbers on uncut board as shown in Figure 1 and described in key. With pencil, mark back board height 11 inches from bottom of last number. Next, mark number hardware placements and corner screws.
2. Cut project pieces as follows:
1 back board (see Step 1)
1 front piece: 5 inches tall
1 bottom piece: 4 inches tall
2 side pieces: 4. inches x 4 inches
3. Dry fit pieces as shown in Figure 2 and make any adjustment cuts as needed.
4. Drill drainage holes in bottom piece using . drill bit. Drill corner holes in back board using bit that is slightly thinner than corner screws. Drill pilot holes for house number hardware.
Finish: Assemble, Paint and Plant
5. Run a bead of glue along front edge of bottom piece. Use nails to attach front piece to bottom pieces as shown in Figure 2. Wipe off excess glue.
6. Run a bead of glue along front and bottom edges of one side piece, then nail to front and bottom pieces as shown in Figure 2. Wipe off excess glue. Repeat with other side.
7. Paint or stain the inside of the planter before attaching to the back board. Take care not to paint or stain edges to ensure proper glue adherence in next step. Let dry.
8. Run a bead of glue along bottom and side edges of box, then attach to back board as shown in Figure 2. Wipe off excess glue. Let dry.
9. Paint or stain as desired and let dry.
10. Attach house numbers with screwdriver.
11. Attach planter to house using long screws, then plant as desired.
Cathy Monrad is the graphic designer and self-proclaimed garden crafter for Upstate Gardeners’ Journal.
Views: 0


