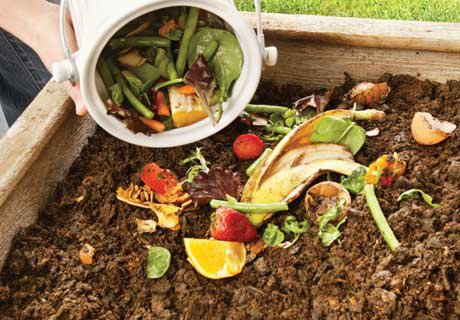
Composting
A few years ago I kicked my daily Starbucks habit in favor of brewing my own pot of morning coffee. I’ve also become more adept in the kitchen, trading takeout for home-cooked meals. But I’ve found that while I’m trying to be budget-friendly, it leads to a pesky problem: each morning I dump my coffee grounds into the trash. And while home-cooked meals are wonderful, I’m always left with a pile of food scraps – potato peels, pepper tops, apple cores – which I shove down the garbage disposal. Waste, waste, waste.
And then I got an email from a reader: a mother of two from Pittsford wrote in and expressed that she wanted to try composting but just didn’t know how to get started. It was a sentiment I had been sharing lately too. All this waste was bogging me down but I just didn’t know what else to do with it. And like her, I didn’t want to start a compost bin, only to realize three months down the line that I didn’t have the glamorous natural fertilizer of my dreams but gross coffee grounds and eggshells rotting in my backyard.
COMPOSTING TIPS
WHAT YOU CAN COMPOST:
- Fruit and vegetable scraps
- Other kitchen scraps (oatmeal, bread, etc.)
- Coffee grounds
- Eggshells
- Floor sweepings
- Paper and cardboard
- Rabbit and hamster bedding
WHAT YOU SHOULDN’T COMPOST:
- Meat
- Dairy
- Disposable diapers
- Oils and fats
- Cat Litter
This summer will mark the second year of my backyard garden – I know that compost is exactly what my little vegetable plot and fresh herbs could use to thrive. I’m not exactly new to the compost game; I grew up with a compost bin in my childhood backyard. It overflowed with grass cuttings, autumn leaves, and banana peels. I remember mixing it around with a pitch-fork and spreading it around the yard in the spring. But composting is much more than just a big outdoor pit filled with scraps, I wanted to try something different. I was amazed to find so many other options available.
For Those Strapped For Time & Outdoor Space
I never imaged that composting was possible without a backyard. Whether your goal is to recycle your organic materials purely for the sake of the environment, or you want to feed your indoor plants or window garden, it is surprisingly easy to compost indoors.
While food decomposes on its own in nature, if you’re strapped for space and time, an automatic composter is a great option. While the cost of a NatureMill automatic composter will run you between $199 and $399, the money is well worth it. Because it’s a kitchen appliance that runs on electricity (though efficiently so it will cost you less than $1 a month), the hot composting method can break down meat, dairy, and fish (things you typically can’t put into a backyard compost heap.) It also works quickly and produces usable compost in just two weeks. I tried out an automatic composter and was amazed at its efficiency. An automatic might also be a great option for supplementing a larger backyard compost bin during winter months when you’re bin is buried beneath two feet of snow. PERFECT FOR: Busy families, apartment/city dwellers, pet owners
For Those Who Want to be Hands On
If you don’t mind a few wigglers, vermi-composting may be for you. (And you’ll likely have the kids eager for this one.) I’m not naturally a fan of insects and other creepy crawlies, but I sucked it up and ordered myself a multi-level worm bin and a thousand red worms. The general idea behind vermi-composting is that you feed your worms unwanted kitchen scraps and they turn all that organic matter into “worm tea” which is ideal for spreading around your garden and plants.
You can either create your own worm bin or order one online. Believe it or not, some bins are designed to be housed indoors… the worms won’t even escape! Mine currently resides in the kitchen but I plan to move it to a shady spot outside once the weather gets warmer. Worm bins can run anywhere from $50 to $200 and a set of 1,000 worms for about $30. PERFECT FOR: Kids who love insects, do-it-yourselfers, apartment/city dwellers, backyards
For Those Who Have Patience and Space
If you have the room, a traditional backyard compost bin can be the most cost-effective and creative method. However, it does take time and patience. A bin needs to be large enough to generate heat to decompose the materials (three feet high) so you need enough space and organic matter to fill it. Traditional bins can be a great hands-on method for families as kids can help in the design and maintenance of the project. Let them assist in selecting the style, designs and supplies to maximize your space and budget. Options range from everything from posts wrapped in chicken wire to buckets with holes to homebuilt wooden boxes. The possibilities are really endless.
With this option you can let nature work her magic (adding new materials and aerating your compost routinely by turning it over with a shovel or pitch-fork) or you can speed things up by adding a set of worms. PERFECT FOR: Do-it-yourselfers, backyards, large yards with lots of yard scraps (grass, leaves etc.)
The seedlings I started a week ago are just starting to sprout. When they’re full grown plants, I can’t wait to use my compost to surround them in my garden this summer. It feels good to know that I’m giving back to the earth and my own plants, instead of creating needless waste.
Jillian Melnyk is the Editor for Rochester Area & Genesee Valley Parent Magazine. To comment on this story email
Ed****@GV******.com
Views: 0


