


A NOTE FROM CRAFTY CAT
Happy summer, crafty kids! This nifty leaf dish will remind you of summer all year long—even when the snow returns. You can use it as a trinket dish to hold your special treasures.
As always, please remember to ask an adult for permission before starting any craft or art project.
GATHER THESE ITEMS:
Piece of wax paper
Plastic knife or clay sculpting tool
Air dry clay
Rolling pin
Small bowl
1/4 inch wood dowels
Paint brush
Large leaf
Clay sealant
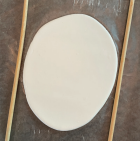
STEP 1: Place dowels about 5 inches apart on wax paper.
STEP 2: Roll clay flat with rolling pin.
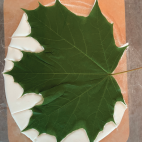
STEP 3: Set dowels aside. Lay leaf right-side up on clay. Gently roll the leaf into clay just to enough to make an imprint of the veins.
STEP 4: Use knife or sculpting tool to cut away excess clay, then use fingers to smooth out the cut edges.
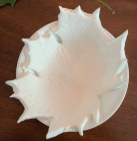
STEP 5: Place clay leaf inside the bowl, gently pressing until the clay forms the shape of bowl.
STEP 6: Remove the leaf by gently pulling on stem. Allow clay to fully dry according to product directions. Optional step: Paint the leaf bowl before sealing. See air dry clay product instructions for best type of paint and drying times.
STEP 7: After fully dry, use a paintbrush to add sealant of choice to project.
This article originally appeared in the Summer 2025 issue of (585) Kids.
Views: 0