


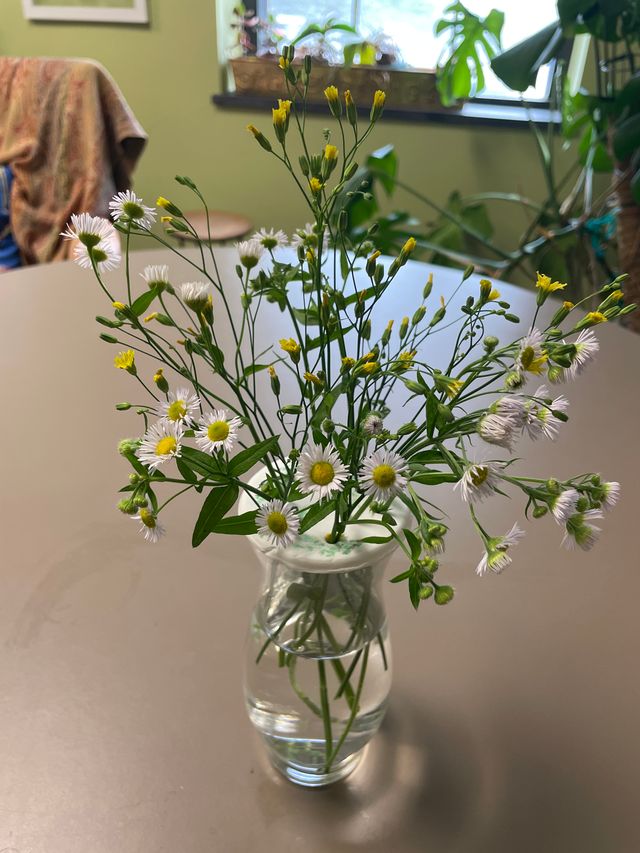
Flower frogs are a helpful tool to assist with arranging flowers because they keep the stems in place. They date back to fourteenth century Japan, became popular here in the early 1900s, then fell out of style when floral foam became the rage in the late 1950s. With the growing problem of microplastics in the environment, taking a step back in time to recycle an old idea is appropriate—and fun.
SUPPLIES/TOOLS
Waxed paper
Air-dry clay
1/4-inch wood dowels
Rolling pin
Round biscuit or cookie cutter slightly larger than vase opening (a vessel like a drinking glass works also)
Doily, leaves from the garden, or clay texture stamps (optional)
Drinking straw
Paint brush
Clay sealant
DIRECTIONS
1. Place dowels about five inches apart on wax paper.
2. Roll clay flat with rolling pin, then set dowels aside.
3. If desired, lay doily on clay and gently roll it into the clay just to enough to make an imprint of the texture. Alternatively, press a clay texture stamp or leaves into the clay to achieve desired look. Gently remove doily, leaves, or stamp.
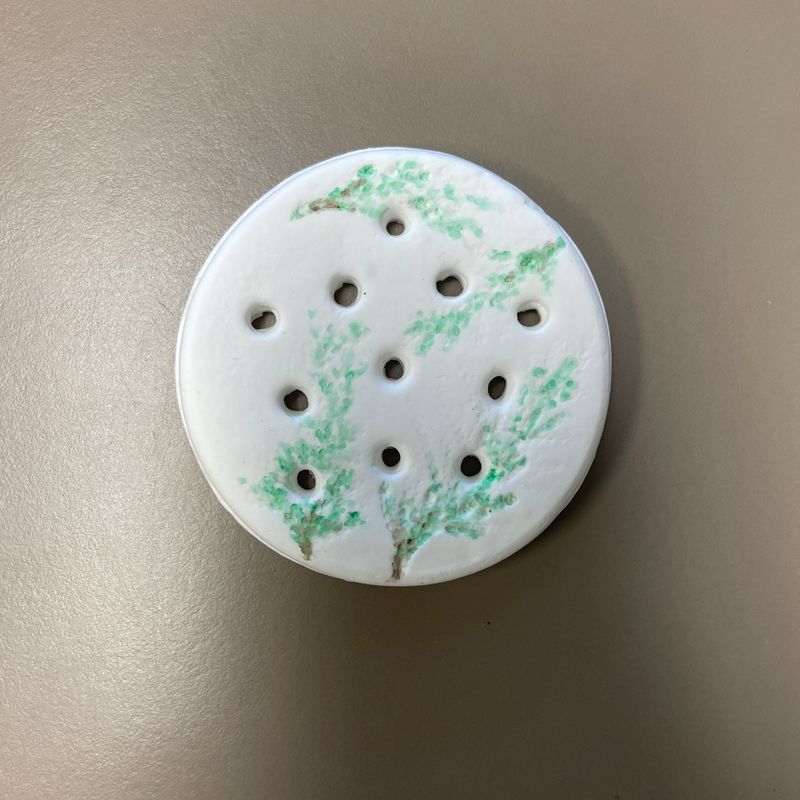
4. Place round cutter on clay, press down, and twist gently to cut out shape. Remove excess clay, then cutter.
5. Use the drinking straw to punch holes in clay at various locations on flower frog.
6. Flip frog over. Use top of vase to press an indentation into clay to create a lip, then remove.
7. Allow clay to fully dry according to product directions. Optional step: Paint frog before sealing. See air-dry clay product instructions for best type of paint and drying times.
8. After fully dry, use paintbrush to add sealant of choice to project. Make sure to completely coat surface to ensure frog is protected from water that may come in contact with it.
9. Fill vase with water and place frog on top of vase. Arrange flowers as desired.
Cathy Monrad is the graphic designer for Upstate Gardeners’ Journal.
This article originally appeared in the July/August 2025 issue of Upstate Gardeners’ Journal.
Views: 11